Deploying Gatsby Sites with AWS Amplify
February 04, 2019
I needed to automate the deployment process of this rebuilt version of my personal website. The original process involved a few manual steps of building and syncing files to an S3 bucket, which was a fine first iteration - I was focused on getting the initial structure and design in place. But, now that I’m starting to spruce up the place a bit more regularly, I saw this as a good opportunity to try out something I came across as I learned more about Serverless and Cloudformation…
AWS Amplify Console
Static site deployment is already really easy: just put your files somewhere accessible on the internet and you’re good to go. But even a few manual steps become a chore to sit through every update, and the piece of mind that all deployed code has been pushed to Github is worth the effort to set up some kind of deployment pipeline.
It’s Automatic
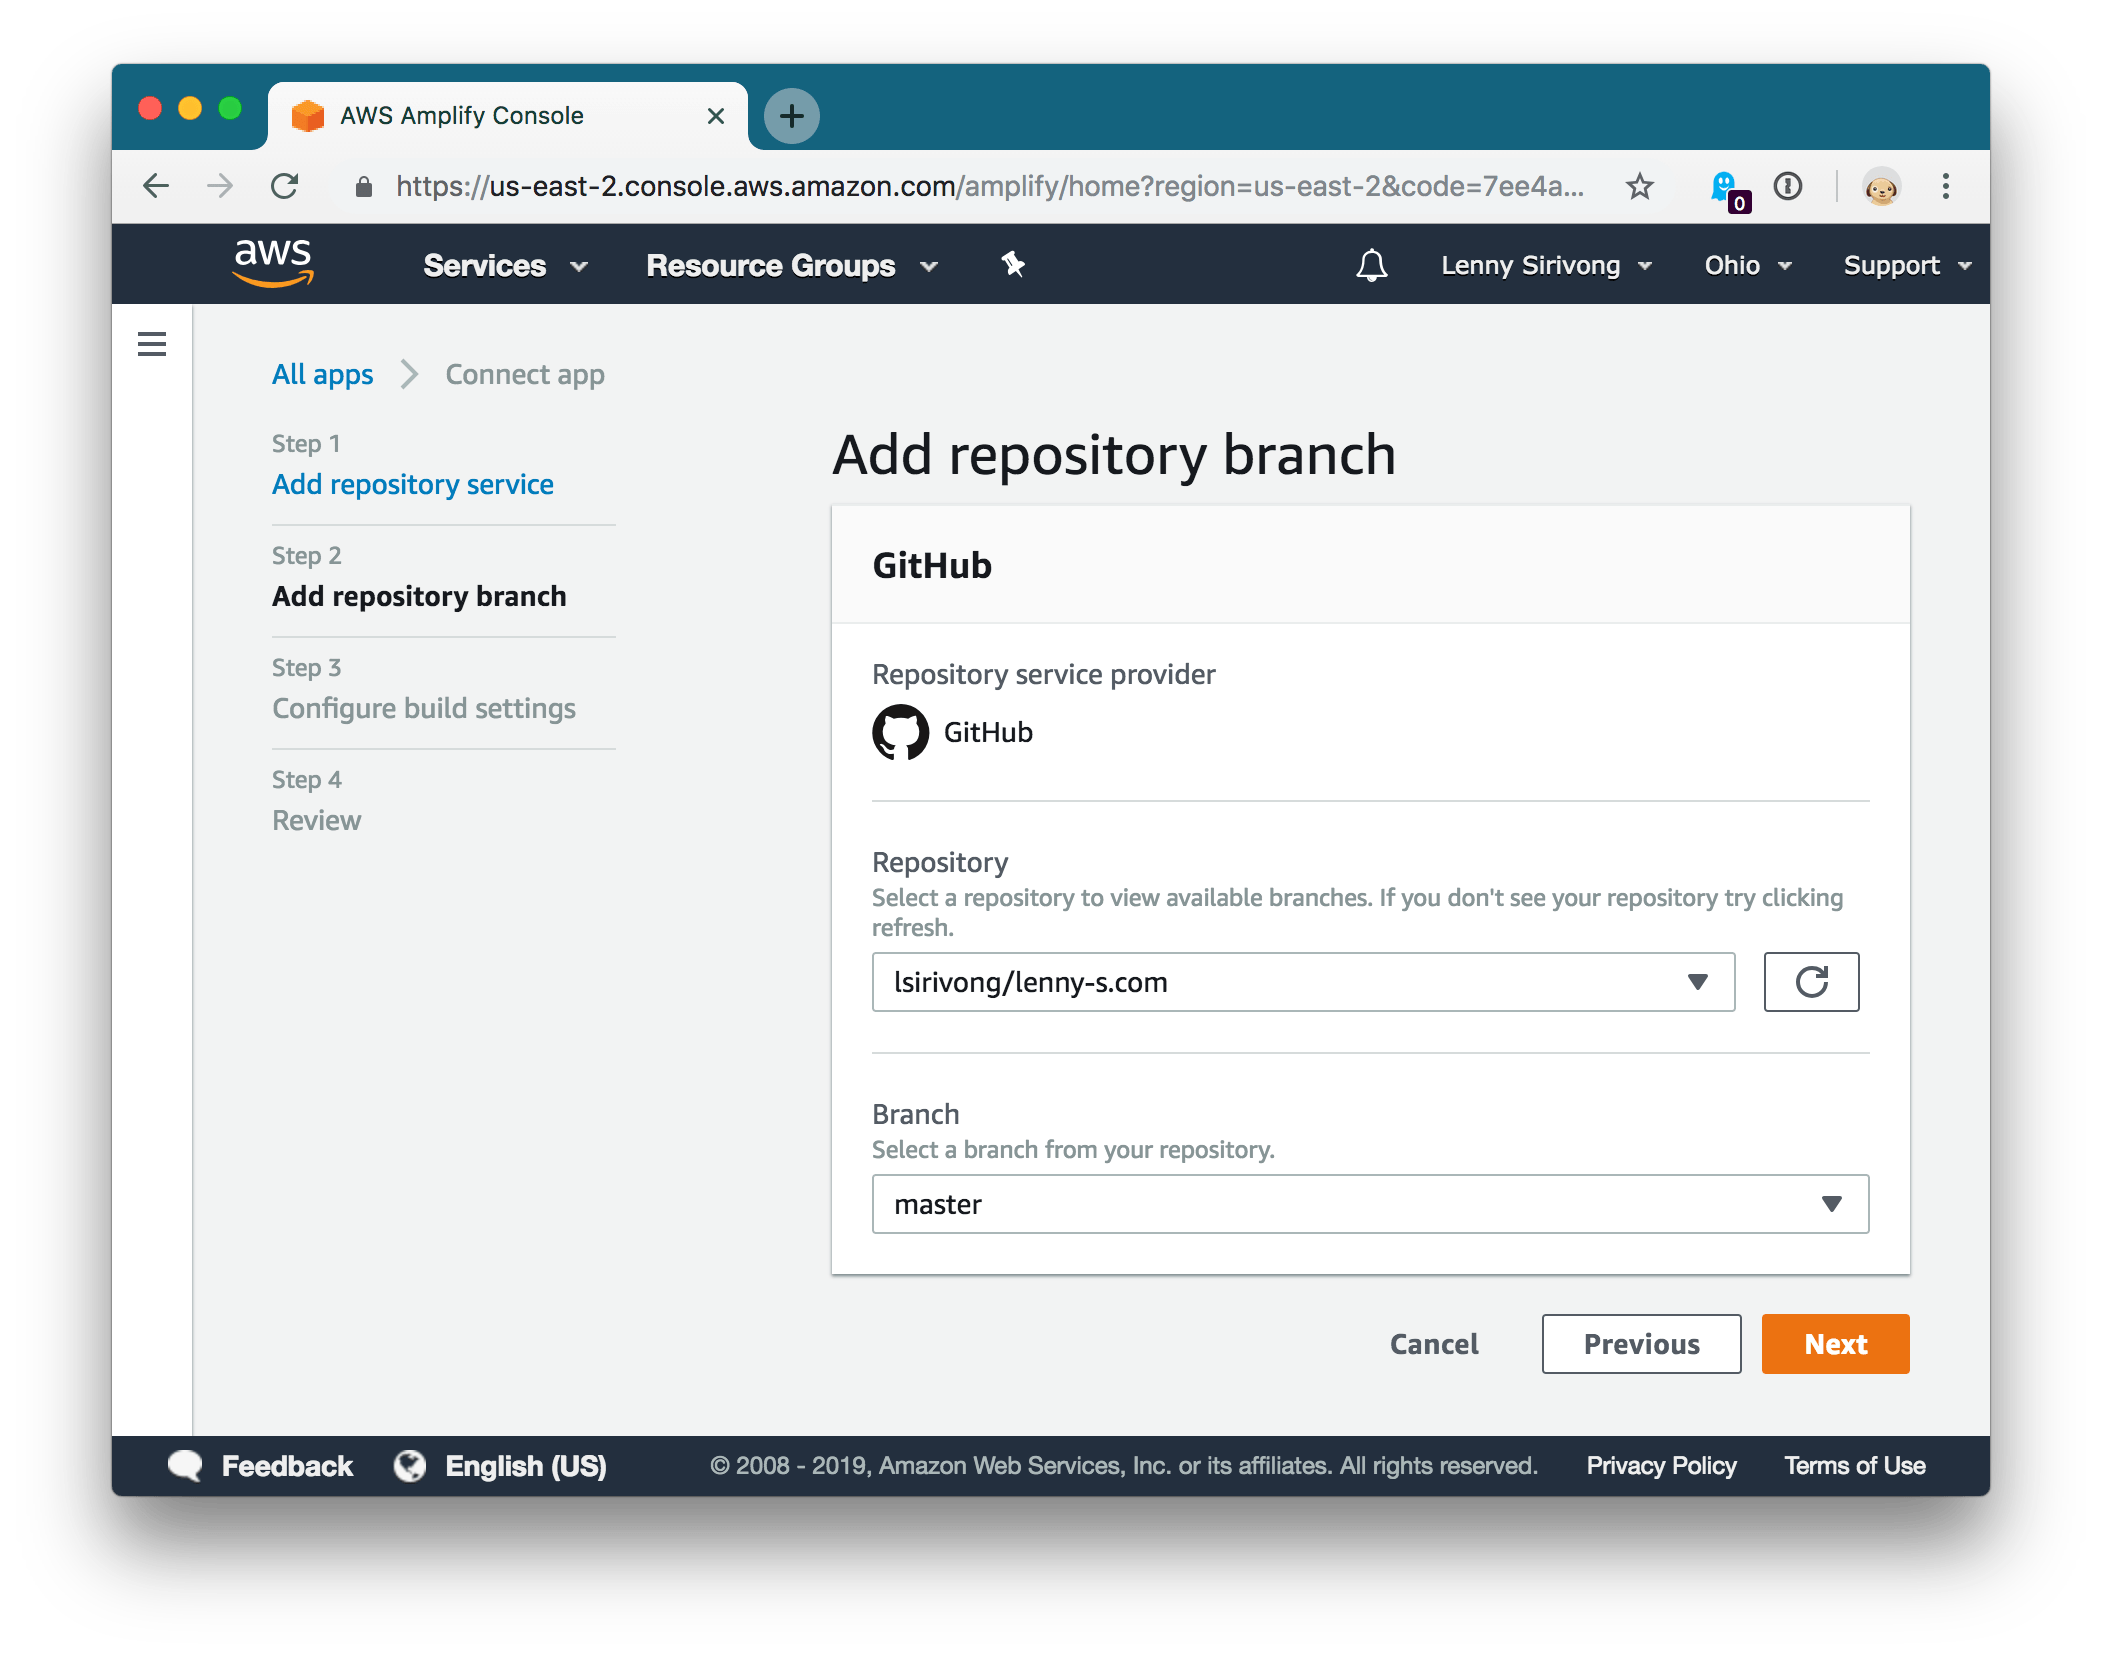
Really, the deployment was set up mostly automatically. From the Amplify console, I chose “Connect app” and from there I just had to authenticate my github account and choose my repository. The rest was a matter of clicking “Next”.
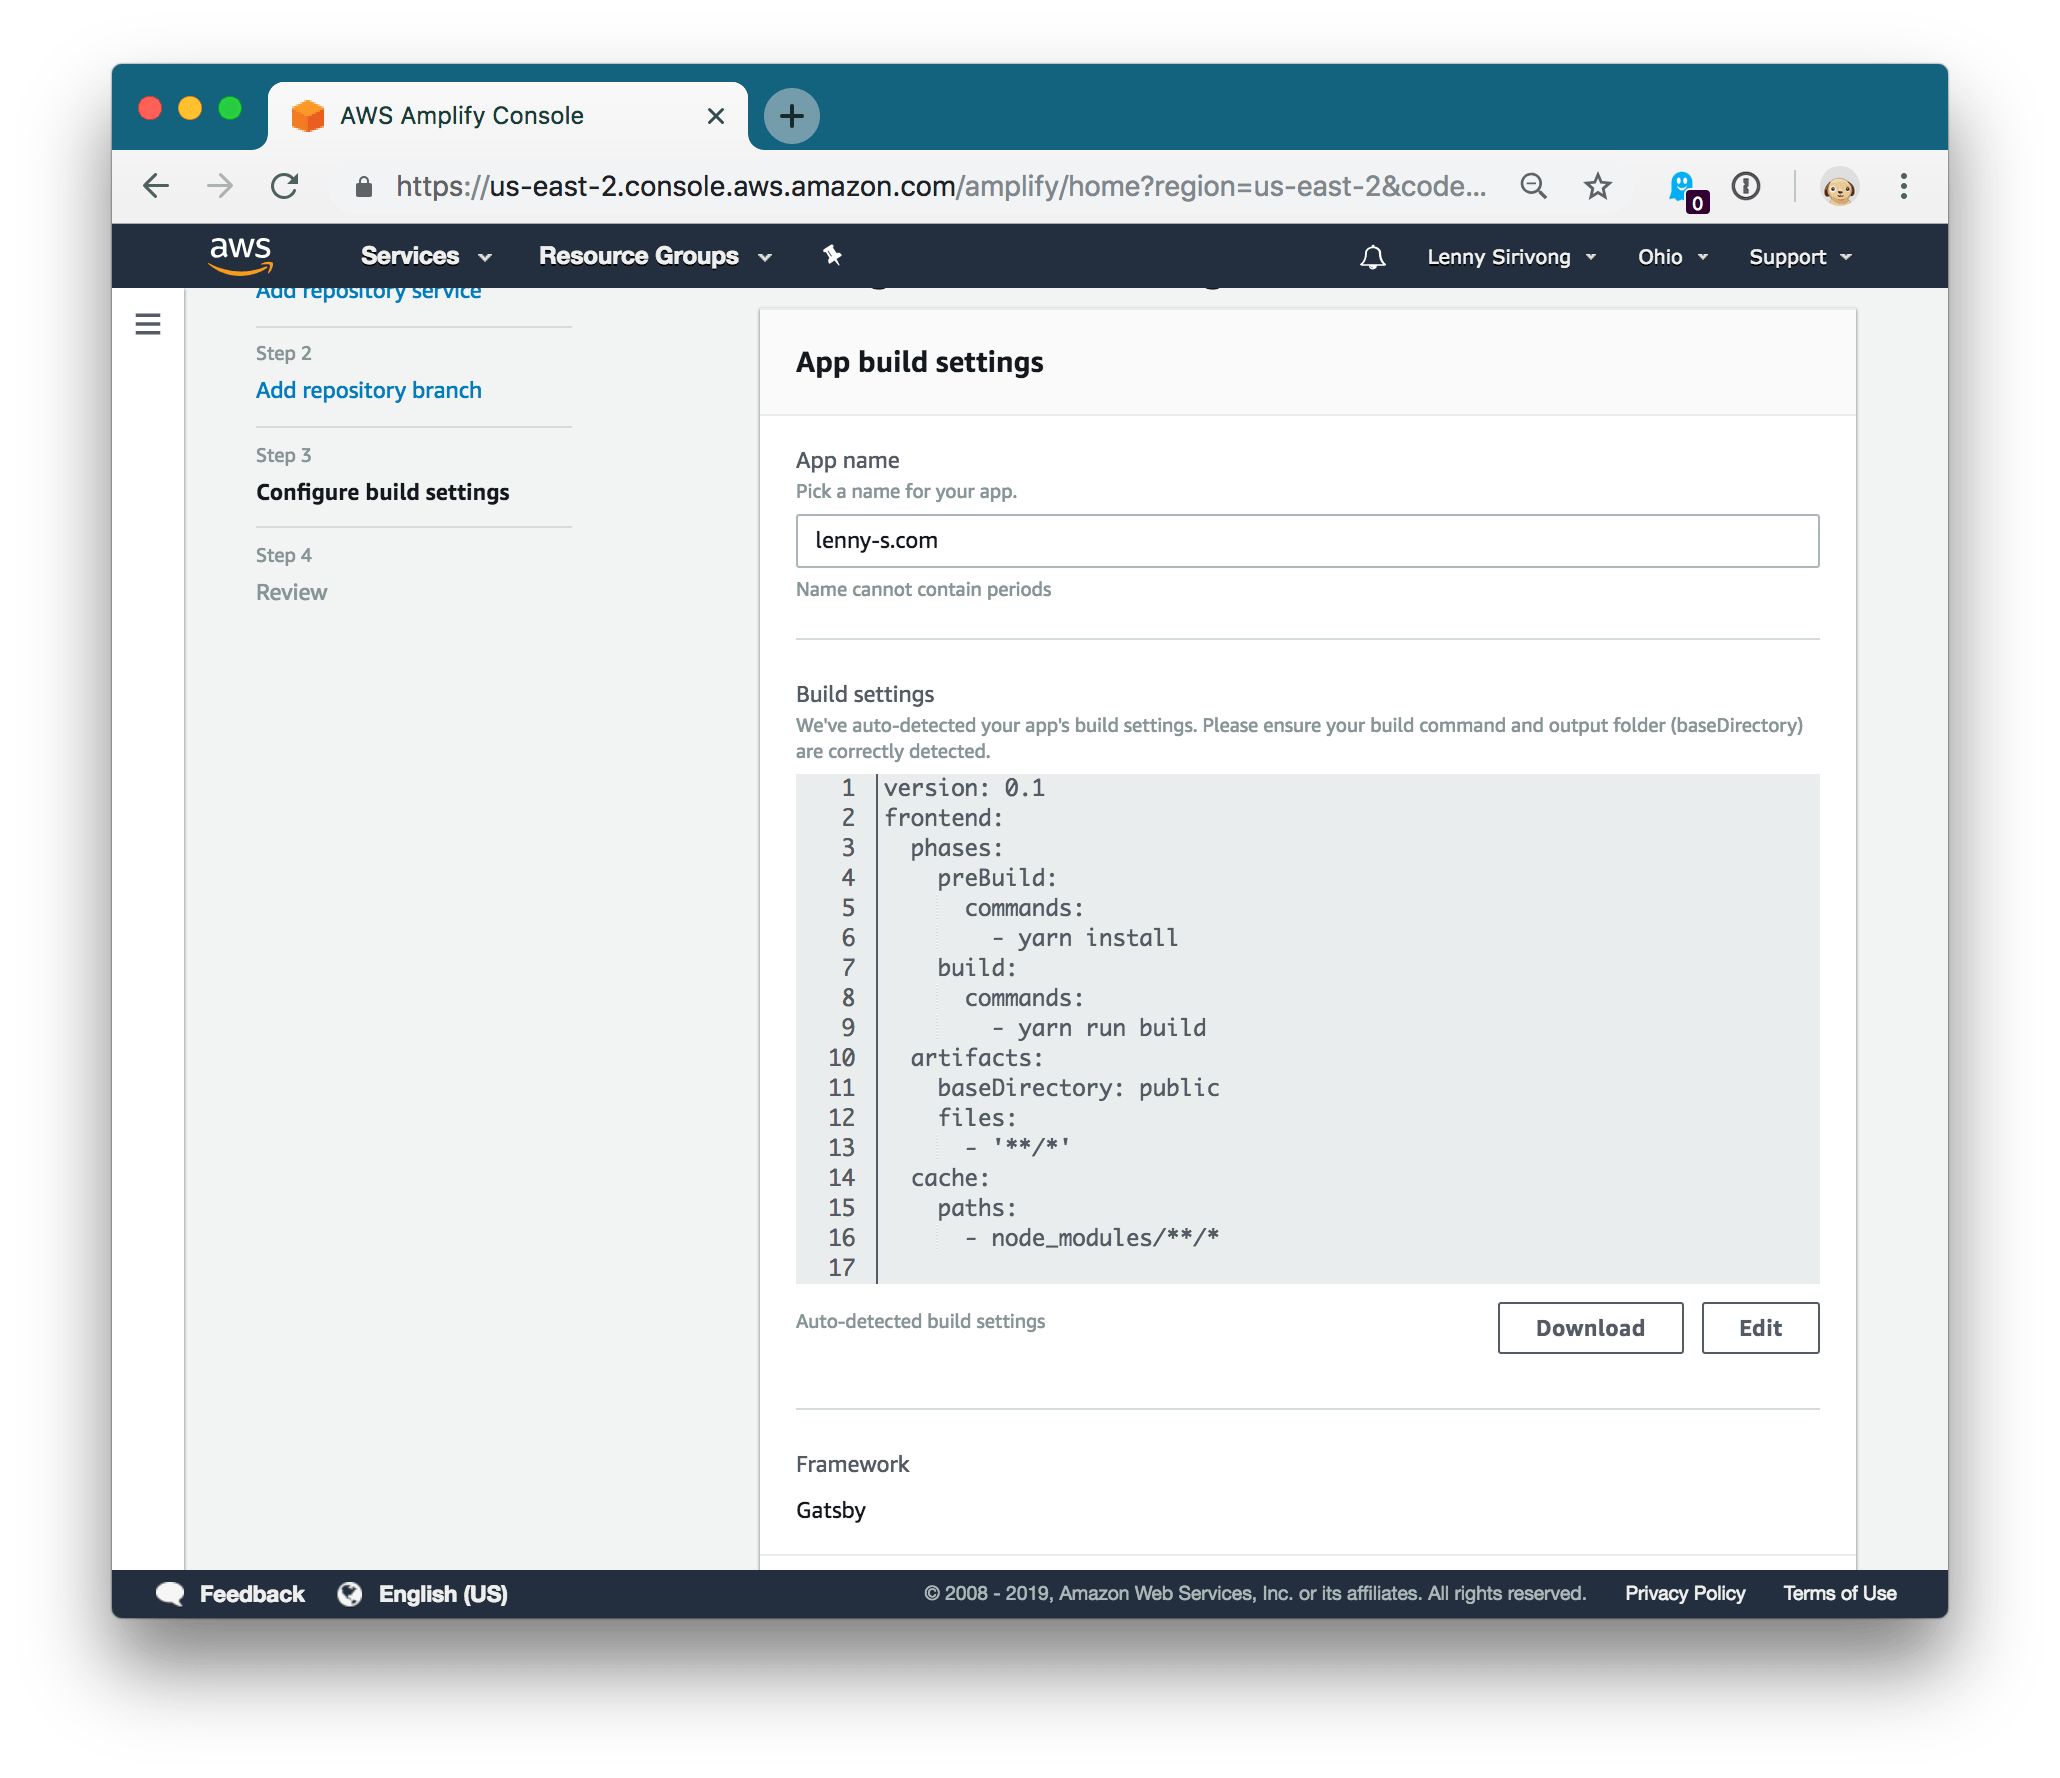
Amplify automatically detects the Gatsby framework and generates a build config with all the steps needed to build and deploy.
Already I had my app running on AWS infrastructure at a publicly accessible URL.
Next, under “Domain Management” I could add my domain which is already managed under Route53 which made the record creation, again, automatic.

The one gotcha here is that I had an existing www record which prevented adding
the domain with a permissions error. Once I dealt with that, Amplify created a root
record, a www record to redirect to root, and a validation record
which I believe it uses to validate ownership for the free SSL cert they issue.
And that was it! My github repository now deploys the latest commits on master to my live URL.
Initial impressions
I haven’t had much of a chance to explore many of the features of Amplify deployment yet, but the initial set up was much easier than I expected, and the tight integration with other AWS resources like Route53 worked without a hitch.
Visual Verify
I like the way the deployment dashboard is laid out, listing the steps as “provision”, “build”, “deploy”, and “verify”. This “verify” step was curious to me; it (at least by default), generates headless chrome screenshots of your app at a variety of screen resolutions.

Not quite a full automated test suite, but it’s a pretty neat basic visual test confirmation that you get for free.
Slow Build Time (Out of The Box)
My builds right now take about 3-4 minutes on average, which I’m not too thrilled about. By comparison, our initial set up on CircleCI gave us builds in the 10s of seconds after the first time the build image is created.
I’m sure this can be optimized, but still, I’d be able to stand something a little bit faster out of the box. As it stands, I’ll want to dig into optimizing it sooner rather than later.

Lenny Sirivong is a full stack web developer and game maker.